
 2021-04-22
Centralized Identity Management – FreeIPA in Practice
FreeIPA provides a centrally managed identity, policy and auditing system. It uses a combination of open source solutions: 389 Directory Server, MIT Kerberos, NTP, DNS, DogTag certificate system, SSSD and other open source components.
FreeIPA provides a centrally managed identity, policy and auditing system. It uses a combination of open source solutions: 389 Directory Server, MIT Kerberos, NTP, DNS, DogTag certificate system, SSSD and other open source components.
FreeIPA integrates with Active Directory and enables central management of security mechanisms such as passwords, SSH public keys, SUDO rules, Keytabs, and access control rules.

In this article, we will perform a quick and simplified (non-DNS) installation of the IPA server in the EuroLinux 8 distribution and allow 2FA-enabled authentication (two-factor authentication) in the sample application – Jenkins.
The instruction can also be used in conjunction with other distributions from the Enterprise Linux family (RHEL®, Oracle® Linux, CentOS), minimum version 8.3.
Installing an IPA server via Ansible
A sample inventory.ini file for project:
[ipaserver]
192.168.122.99

[ipaserver:vars]
server_hostname=ipa.example.local
domain=example.local
realm=EXAMPLE.LOCAL
firewall_zone=public
ipa_user=admin
ipa_user_password=KX7c39BV384PsE
manager_password=YuH73PLvc93T
Comprehensive, simplified FreeIPA installer – playbook ipa.yml:
- hosts: ipaserver
  remote_user: root
  tasks:

  - name: zdefining the host
    hostname:
      name: "{{ server_hostname }}"

  - name: editing the hosts file
    lineinfile:
      path: /etc/hosts
      line: "{{ ansible_host }}   {{ server_hostname }}"

  - name: activation of the module with IPA
    command: dnf module enable idm:DL1 -y
    args:
      warn: false

  - name: distro-sync
    command: dnf distro-sync -y
    args:
      warn: false

  - name: installation of IPA server packages
    yum:
      name: ipa-server
      state: present

  - name: firewalld installation
    yum:
      name: firewalld
      state: present

  - block:
    - name: firewalld launch
      systemd:
        name: firewalld
        enabled: yes
        state: started

  - name: launching the IPA installer
    command: ipa-server-install -U --hostname={{ server_hostname }} --domain={{ domain }} --realm={{ realm }} --ds-password={{ manager_password }} --admin-password={{ ipa_user_password }}

  - name: update of the IPA server
    command: ipa-server-upgrade

  - name: opening the required ports
    firewalld:
      zone: "{{ firewall_zone }}"
      service: "{{ item }}"
      immediate: true
      permanent: true
      state: enabled
    loop:
      - dns
      - https
      - http
      - ntp
      - freeipa-ldap
      - freeipa-ldaps
Launch of the playbook:
ansible all -i inventory.ini -m ping && ansible-playbook -i inventory.ini ipa.yml
IPA server configuration via GUI
After installing the server, add an entry to the /etc/hosts file on your personal computer:
server_ip ipa.example.localThen, open the page in the browser https://ipa.example.local.
Log in using the credentials defined in the Ansible configuration. After logging in for the first time, change the password (Actions → Reset Password). For subsequent users, changing the password will be automatically forced by the system.

Two-factor authentication
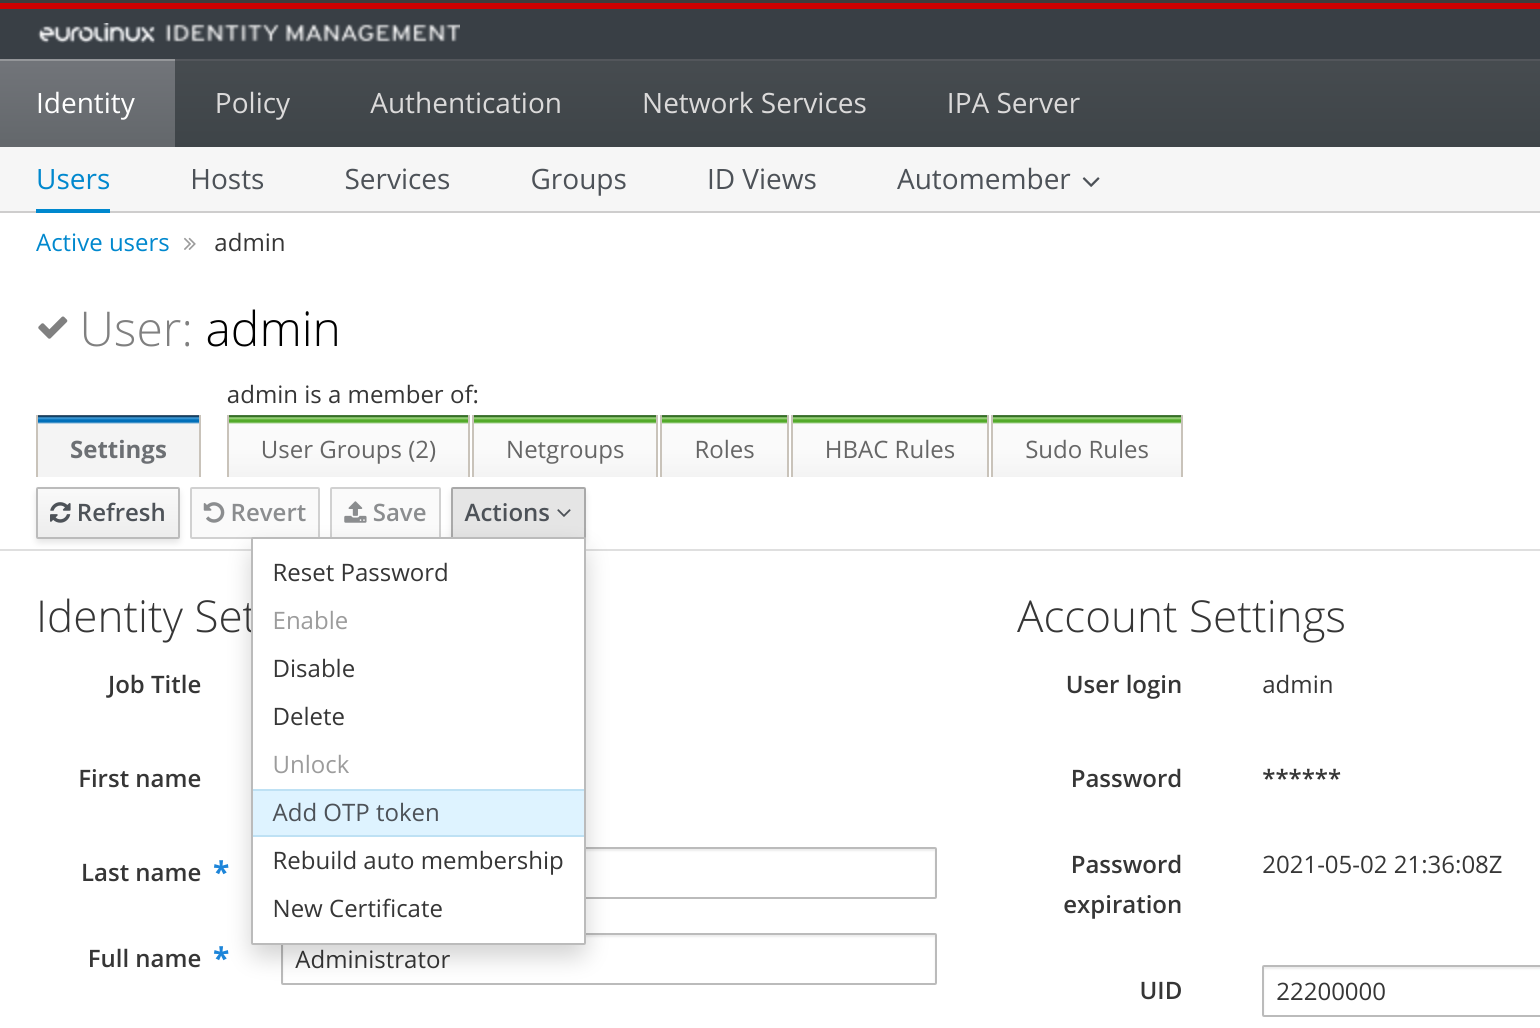
In your user profile on the IPA server, select the Actions button and the Add OTP token option from the drop-down list.
Enter your Unique ID, Description, data range of operation, and leave the rest of the fields as default or blank and press the Add button. A QR code will be displayed.

Install the Google Authenticator application on the mobile device and add to it the QR code displayed on the website.
In the FreeIPA interface, press the OK button displayed under the QR code and go to the User authentication types field. There, select the Two factor authentication (password + OTP) option.
At the top of the profile, press the Save button and log out.
OTP Token Synchronization
Before you can log in with 2FA for the first time, you must synchronize the OTP token. For this purpose, in the login window to the IPA server, select the Sync OTP Token option. Fill in the username and our password, and then enter the first code displayed in Google Authenticator in the First OTP field and the next code (displayed after some time) in the Second OTP field. Fill in the Token ID field with the text displayed below the code in the Google Authenticator mobile app and press the Sync OTP Token button.

Return to the main login window and enter the login, password and immediately after the password add (in the same field) the code displayed in the Google Authenticator app. Click Log in and you should be logged in using 2FA.
Enforcing 2FA in LDAP in the FreeIPA web interface is done via: Identity -> Services -> ldap/ipa.example.local -> Authentication indicators.
Jenkins authorized by IPA server with active two-factor authentication
On the server where Jenkins is installed, add an analogous entry to the /etc/hosts file. In Jenkins plugins, we should have the LDAP plugin installed by default – if not, then of course this plugin should be installed before the next step. In the interface, click on the Manage Jenkins -> Configure Global Security at section Security Realm and LDAP button.
Fill in the Server field Server ldap://ipa.example.local:389
Press the Advanced Server Configuration button and in root DN enter dc=example,dc=local, in Search users cn=users,cn=accounts. Leave the rest of the fields with default settings or blank and press Test LDAP settings. Enter your data (adding again the OTP code right after the password) and only after the authentication is successful, press the Save button.
In the Authorization field below, choose the Matrix-based security option and make individual user rights dependent on their belonging to groups defined on the IPA server.
In a similar way, we can add IPA server support to any service that uses LDAP authentication. The absence of the requirement for an additional field for two-factor authentication codes greatly facilitates integration with subsequent servers and services, as no additional work is needed on plug-ins that activate LDAP authentication.